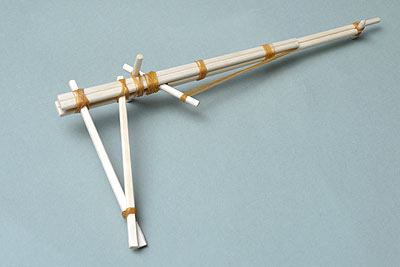
The old style Rubber Band Gun that you know already....
You can shoot it semi-automatically with an unique technique.
- First -
You are allowed to use this content for personal hobby use only.
You are prohibited to sell the kit or finished product or the plan that you have built on the basis of this content.
Do you understand and accept above? Then let's enjoy building.
On rare occasions (for example, the work quality and the loading condition.... etc. ), a rubber band is released backward and you might be hit your face or eyes by it.
Please use this content at your own risk. I am not responsible for such accidents.
Do you understand and accept above? Then let's enjoy building.
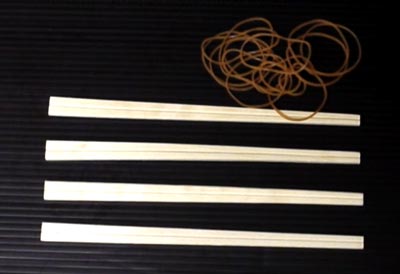
Disposable Chopsticks --- 4
Rubber Bands ------------ about 10
misstyping: mazzle ---> Muzzle
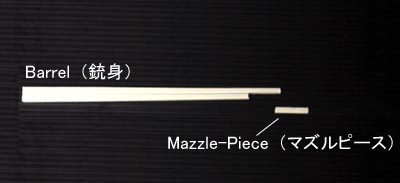
(1) Muzzle-Piece and Barrel
Cut to 25mm only one side of a chopstick and it is used as the Muzzle-Piece.
The remaining stick is used as the Barrel.
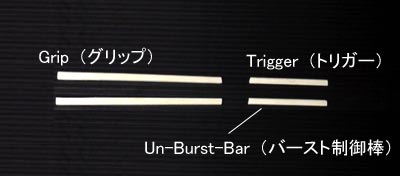
(2) Trigger, Un-Burst-Bar and Grip
Split a chopstick.
Cut to 65mm each.
They are used as the Trigger and Un-Burst-Bar.
The remaining sticks are used as the Grip.
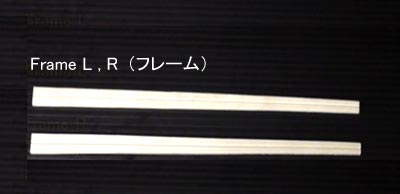
(3) Frame (L, R)
Two set of chopsticks are used as the Frames without cutting.

misstyping: Grip L, R ---> Grip Fore, Rear
misstyping: mazzle ---> Muzzle
(4) All parts
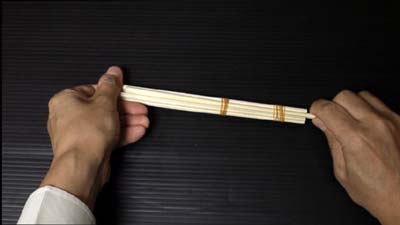
(5) Sandwitch the Barrel between the Frames, And bind them with rubber bands at two points.

(6) Pull out the Barrel from the Frames. (10 cm)
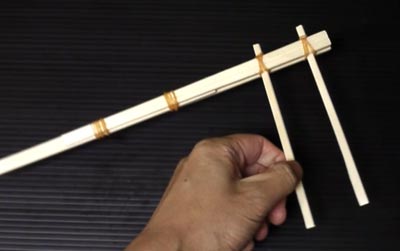
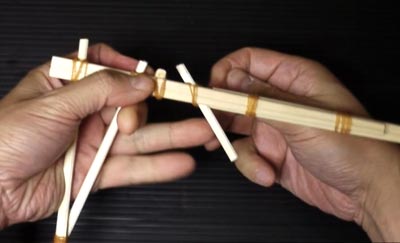
(7) Insert two Grip's sticks into the Frames, and bind each tops with rubber bands.
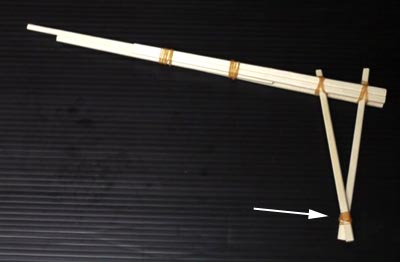
(8) Bind the each Grip-end with a rubber band.
(the Rear-Grip must be kept the right angle to frames)
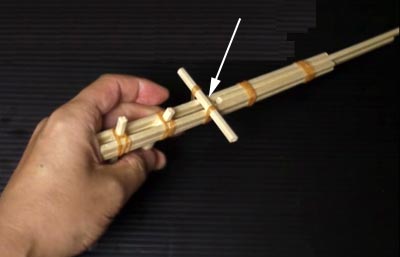
(9) Bind the Un-Burst-Bar on the Frames with a rubber band.
(10) Insert the Trigger between the Frames, and wind them with a rubber band.
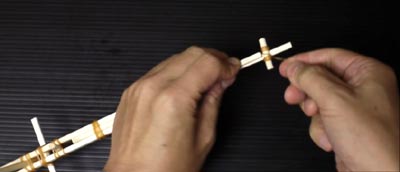
(11) Bind the Muzzle-Piece under the Barrel-head with a rubber band.
2011.11.23 UP