OGG CRAFT'S GUN LOCKER
How to make P209 FRONTIA (updated in 2020)
Updated in 2020
There is a video
In 2002, I made a rubber band gun named P209 BUL PUP and another trial design just before for its actuation test.
I tried to redesign this old-time and no-named triral work and made this article for free plan in 2013. This work was named "P209 FRONTIA".
(Updated in July, 2020)
I again redesigned the FRONTIA for free plan in 2020. The improved point of new design is that the trigger spring (rubber band) can be easily attachable without gun stripping.
The PDF plan and this article are updated newly.
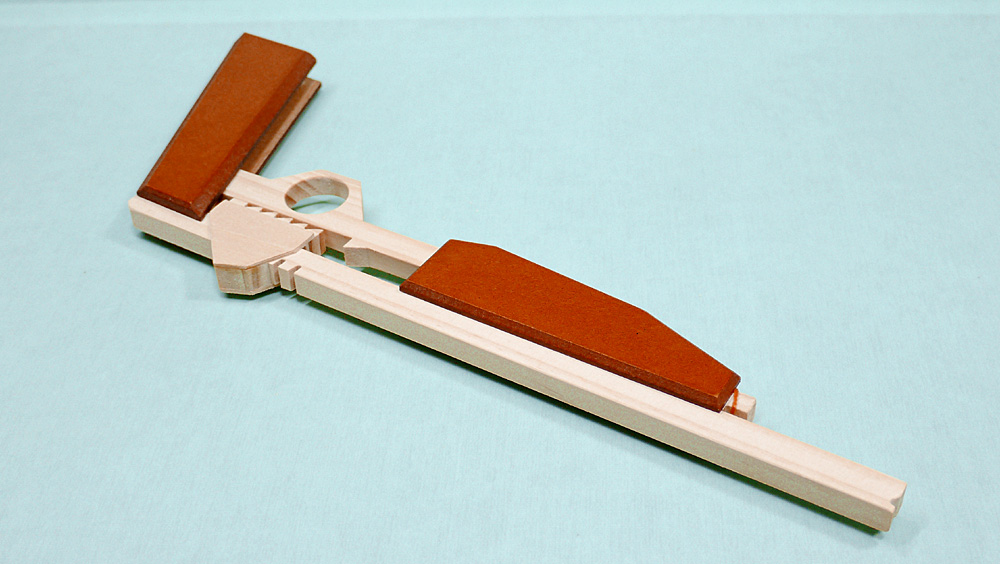
- About P209 FRONTIA (updated in 2020) -
Category: Hand gunCapacity: 6 rounds
Mechanism: Ramp release
Youtube video
- Templates -
PDF plan is here
- Note -
You are allowed to use this content for personal-hobby-use only.
You are prohibited to sell the kit or finished product or the plan that you have built on the basis of this content.
Can you accept above? Then let's enjoy building.
- Materials -
- Tools -
- Assembling -
Stick templates on MDF board with a spray adhesive (or double sided tape).
Cut out each part with a scroll saw.
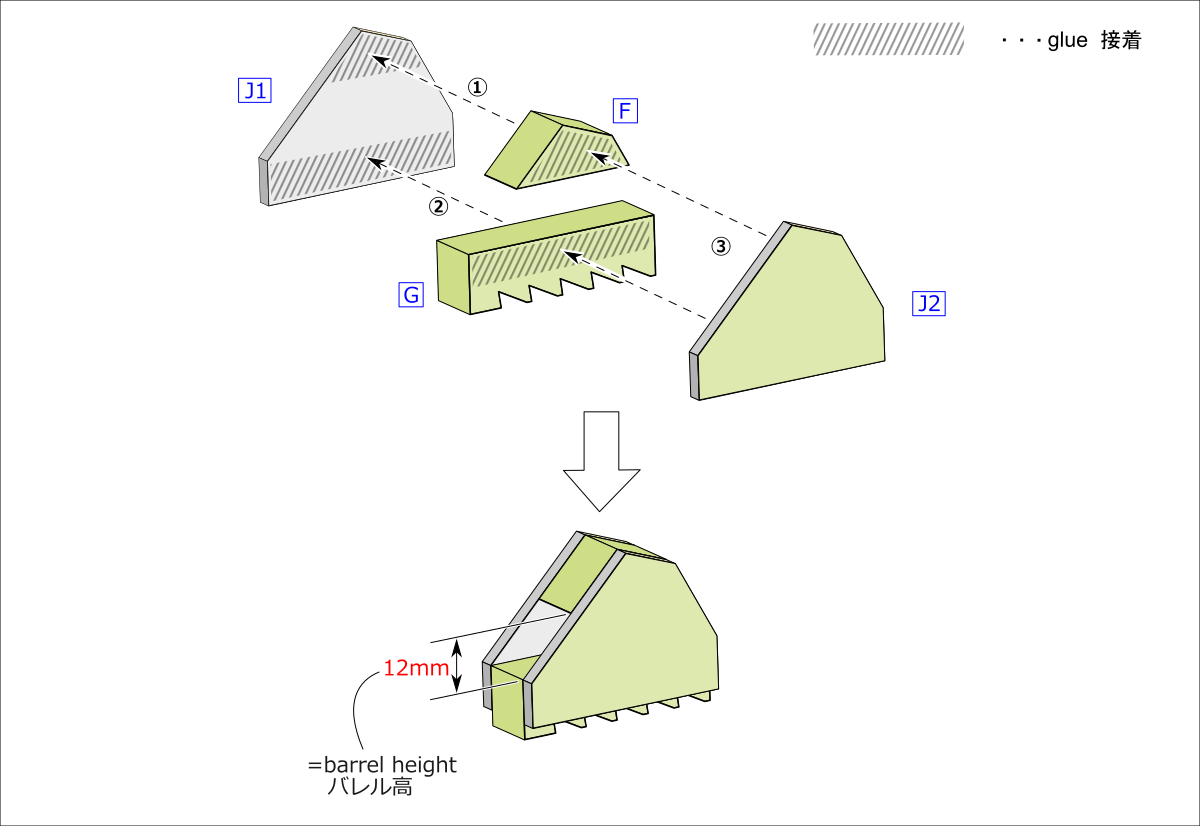
1
Glue each part for the releaser F G J1 J2
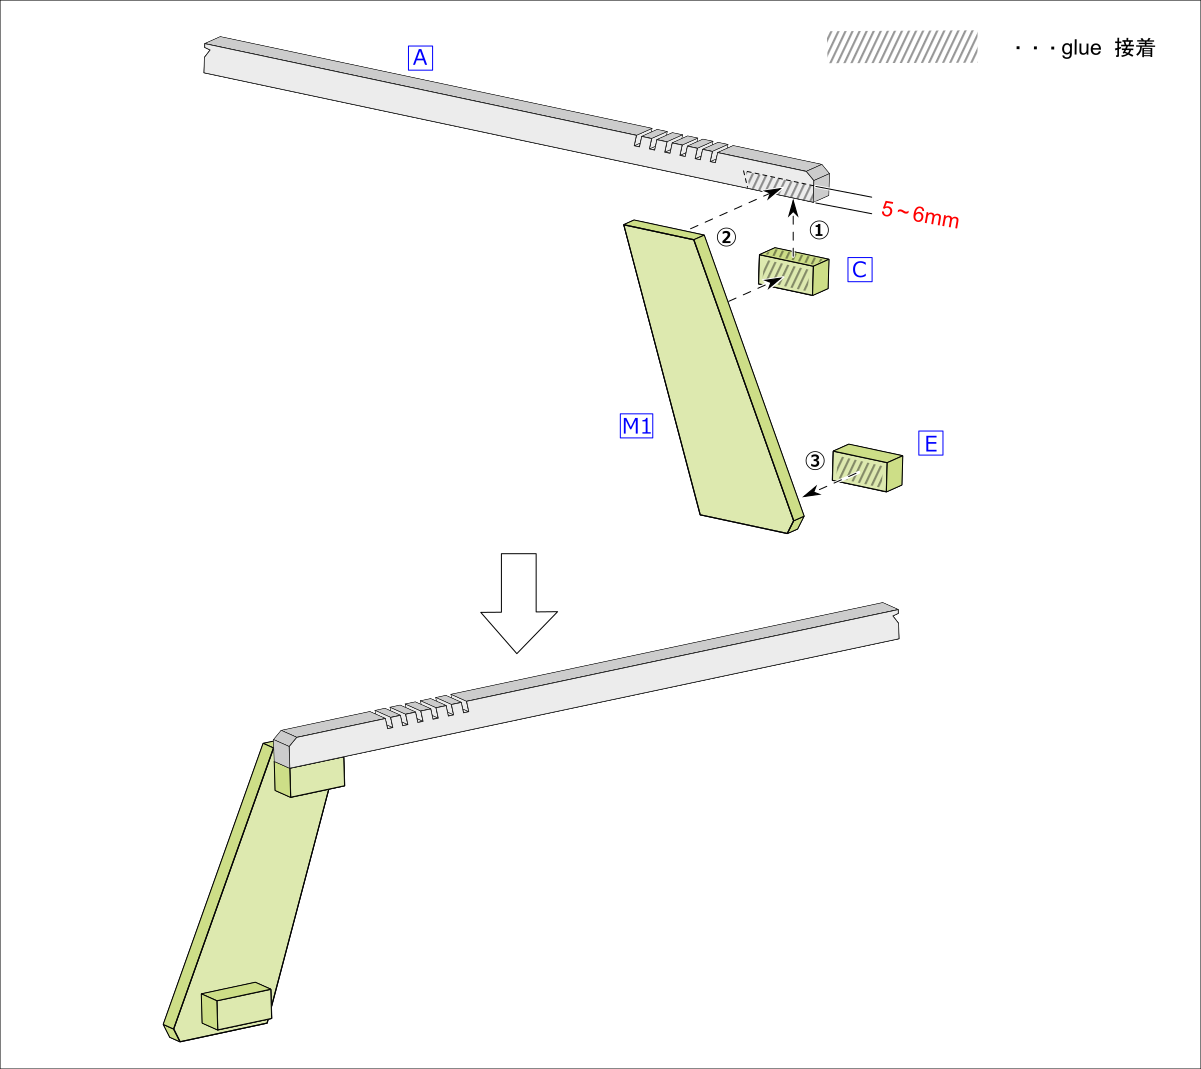
2
Glue each part for the barrel-group A, C, M1, E
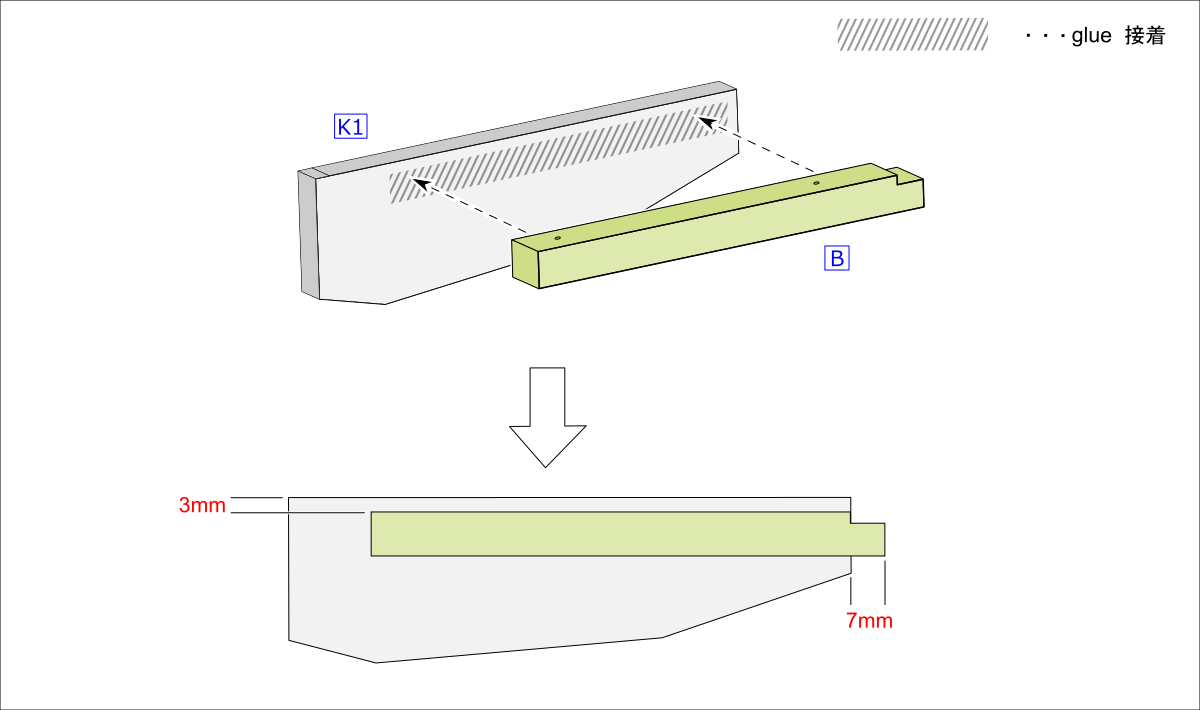
3
Glue B to K1
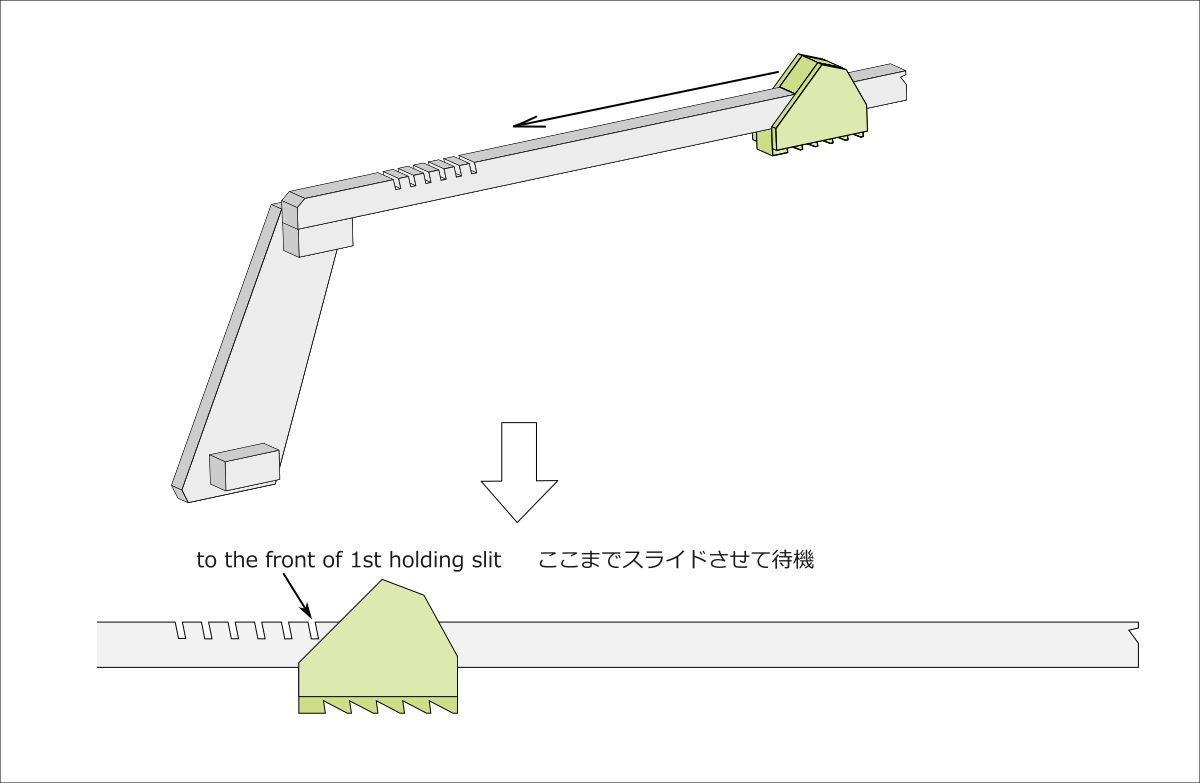
4
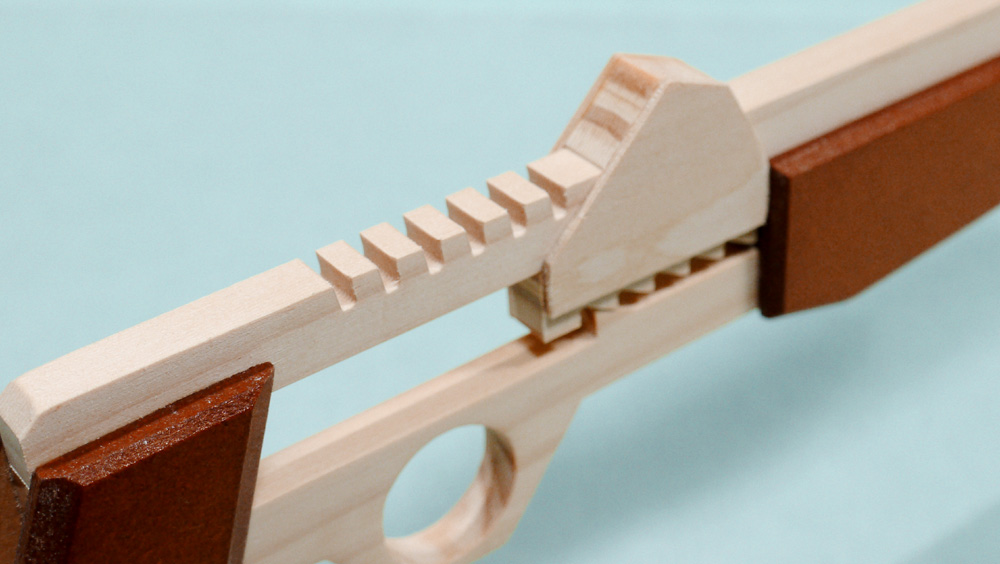
Slot the releaser into the barrel
5
Screw the fore grip 3 to the barrel while touching to the releaser
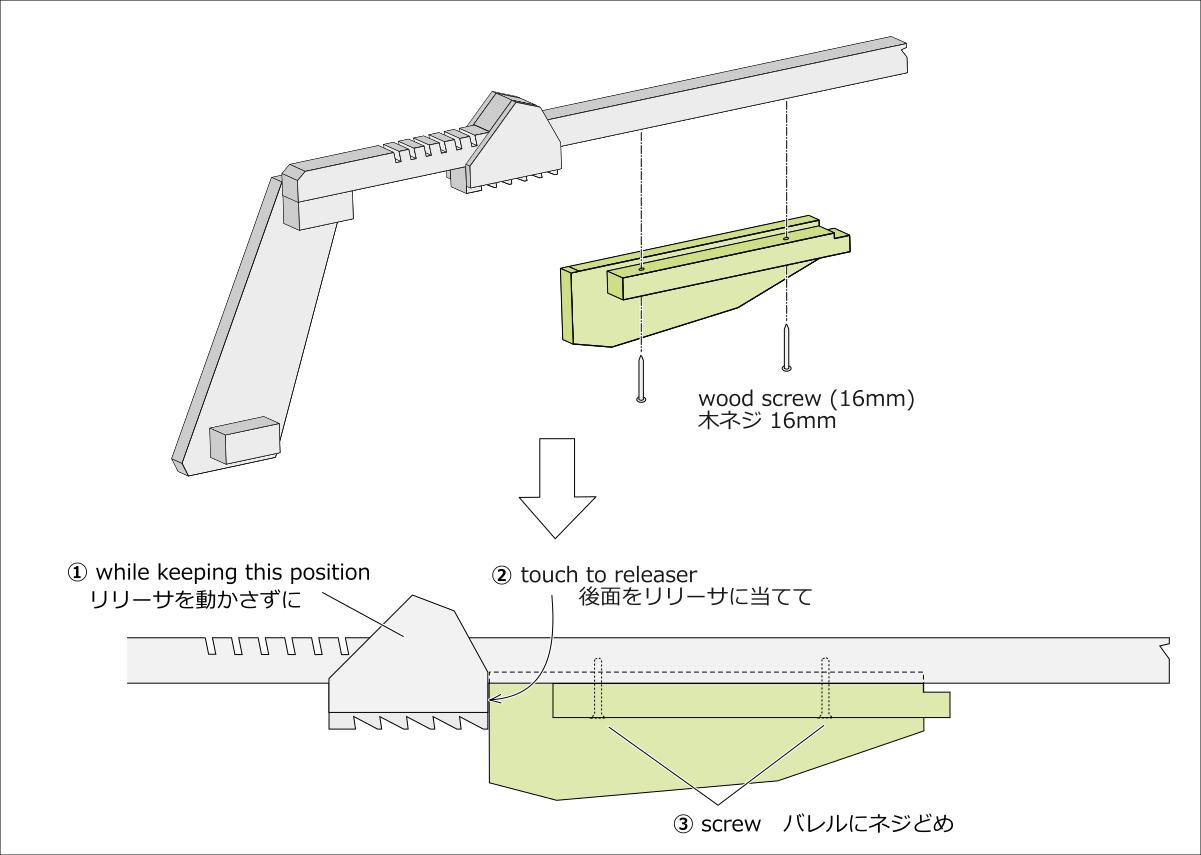
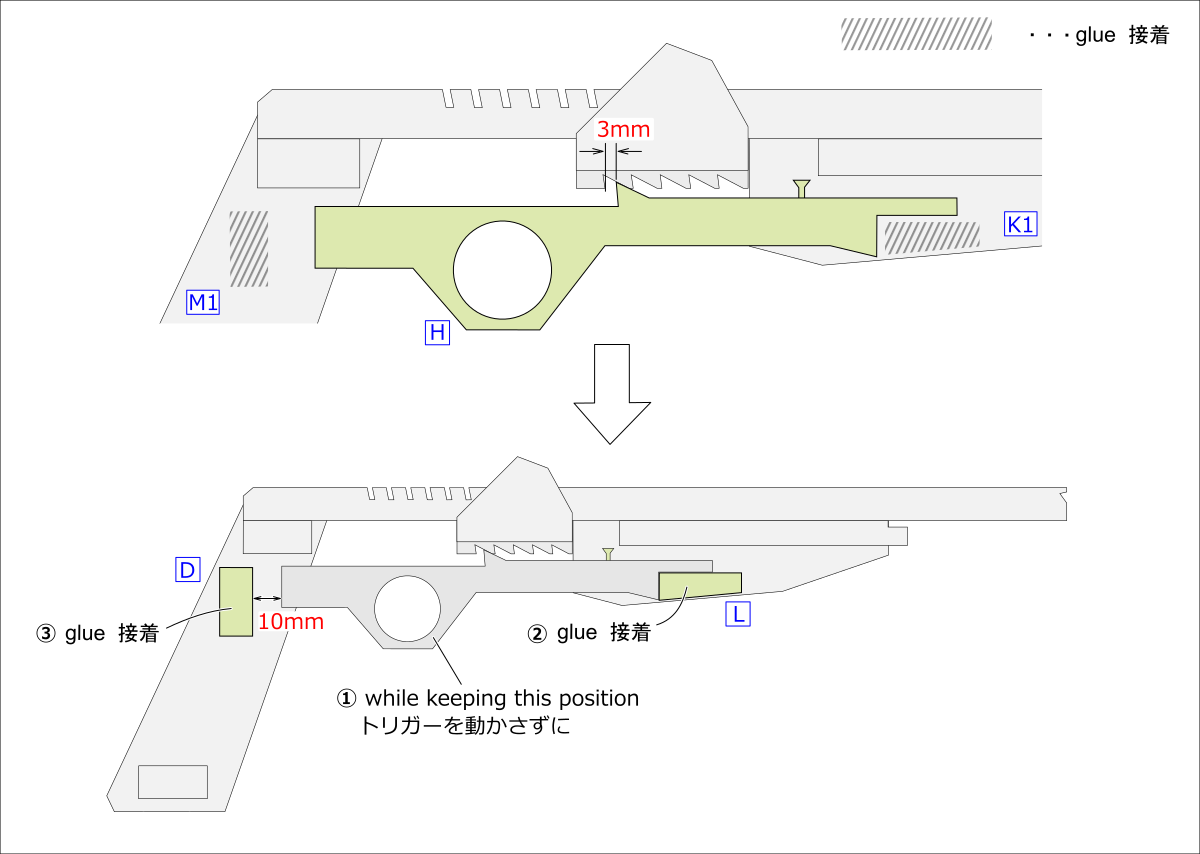
6
(1) Put H temporarily on the work
(2) Glue L and D
(1) Put H temporarily on the work
(2) Glue L and D
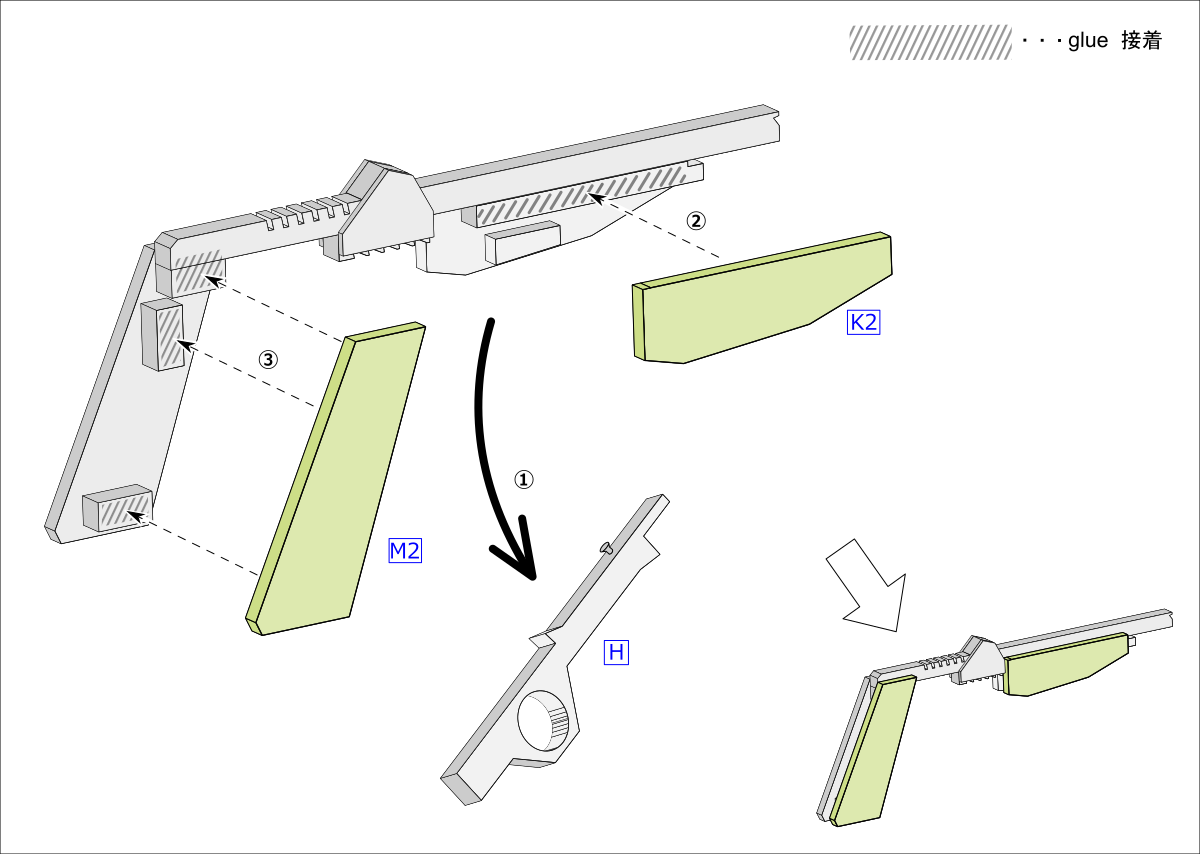
7
Glue K2 and M2 after removing H
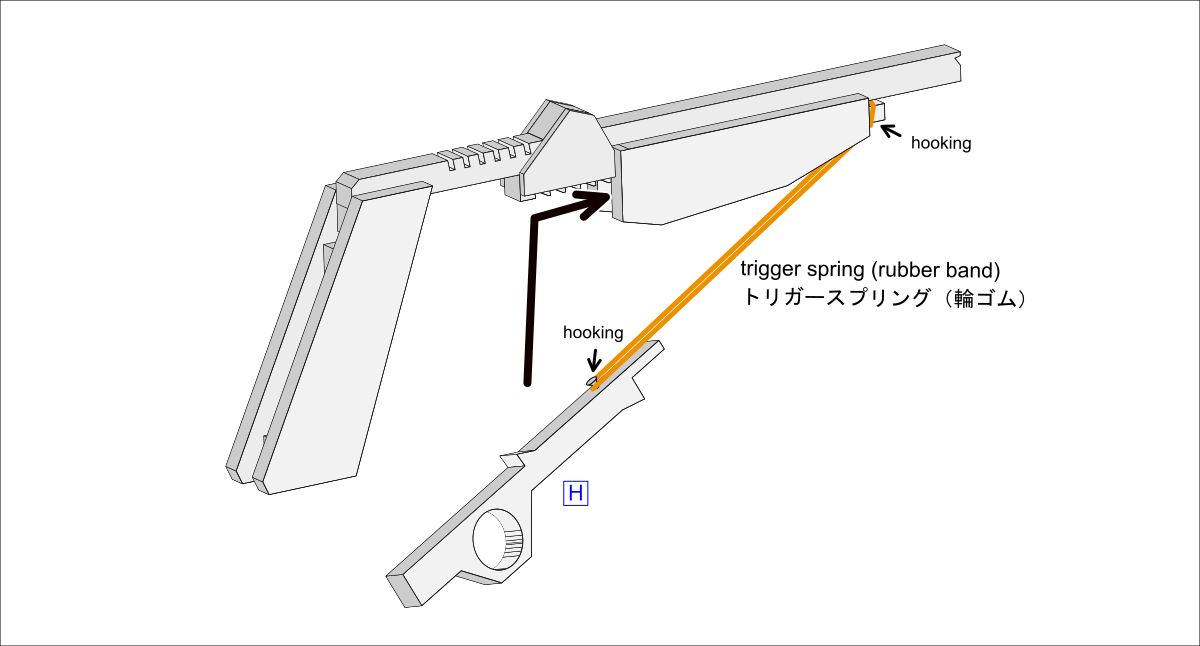
8
Attach a rubber band as the trigger spring, and insert H into the fore grip
9
Completed
- Loading -
1
Slide the releaser forward while pushing down the trigger
2
Load rubber band from the rearest hook
- Finished work -
2013.05.27 UP
2020.07.06 UP
Copyright © oggcraft.jp. All Rights Reserved.